Emailing Payslips
After finalising the pay period, simply click the ‘Email Payslips’ button within the Payroll function.
1) On the left hand side, select the employees for whom you wish to email payslips. Please note only employees for whom you have email addresses entered will be displayed. Several options for selecting which payslips to email are available by clicking the ‘Select By’ button.
2) To further customise your payslips before emailing, click the ‘Options’ button on the right hand side. This facility allows you to add or remove certain information on the payslip, for example to add an employer address.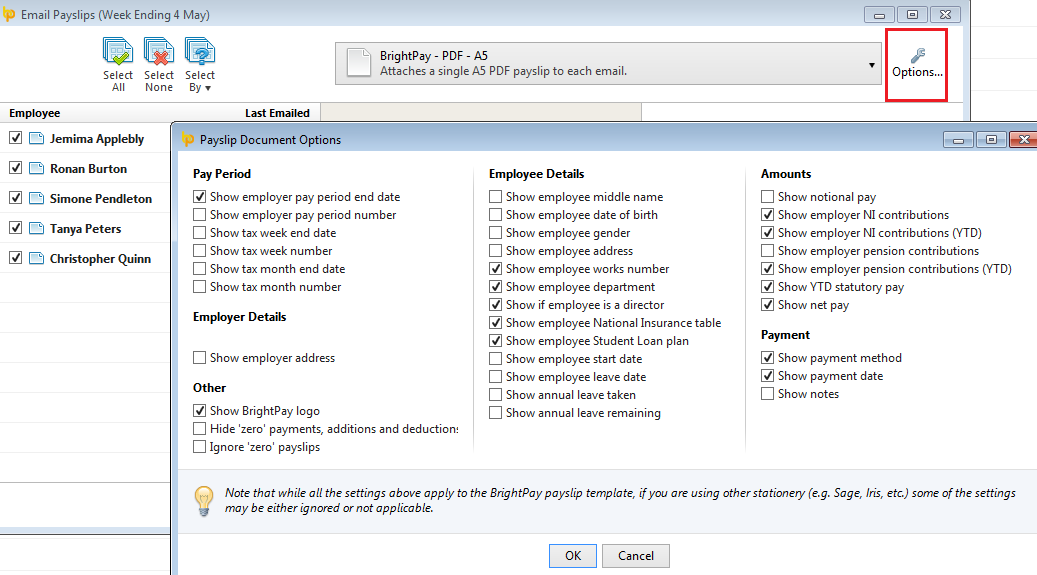
3) On the right hand side, enter a ‘Reply-to’ email address. This is a mandatory field and a valid email address must be entered before the emails can be sent. If required, more than one CC email address can also be entered in the box below.
4) Enter a subject of your choice for your emails, either by manually typing this in or by using the smart text options.
5) Enter a description to accompany the payslip if desired, by manually typing this in the box provided or using the smart text facility.
6) If you would like to password protect the payslip, simply tick the box provided. Employee passwords must be entered beforehand within the HR section of their Employee record in order for the payslip to be password protected on receipt. Password protection is recommended if the recipient is not in a secure environment when they receive their payslip and will ensure that the payslip can only be viewed when the password is entered.
7) When ready to email the payslips, simply click ‘Send Emails’.
8) Once emailed, you will see the date and time they were emailed automatically populated under "Last Emailed".
9) Payslips can be emailed again at any time.
Additional Information
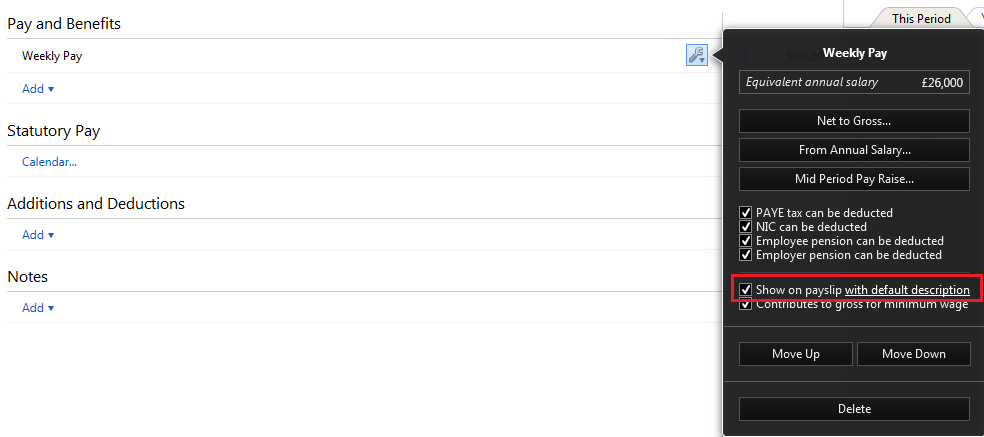
BrightPay allows for specific period payments, daily payments, hourly payments, piece payments, additions and deductions to be given a custom description to appear on an employee's payslip, if required.
- To set a customised description, before finalising a payslip, click the spanner symbol for the pay item in question, followed by 'show on payslip with default description':
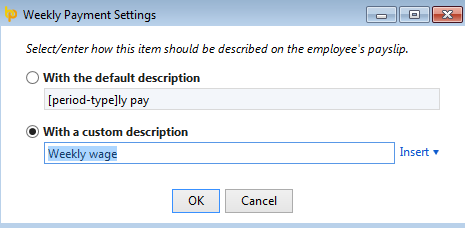
- Enter the desired description and click 'OK':
- On finalising the pay period, the employee's emailed payslip will now reflect the customised description:

Please note: the customised payslip description will hold going forward until such time the user removes it.
Need help? Support is available at 0345 9390019 or brightpayuksupport@brightsg.com.