Moving to BrightPay - Continuing Auto Enrolment from a previous software
If you have already staged in a previous tax year and you were using different payroll software for tax year 2016-17 or you are switching to 17/18 BrightPay during the 2017-18 tax year and have already staged, please see the instructions below for updating 17/18 BrightPay with your automatic enrolment information:
1) Before finalising any pay periods, first enter your Staging Date and Declaration of Compliance date (if completed) within the Pensions utility:
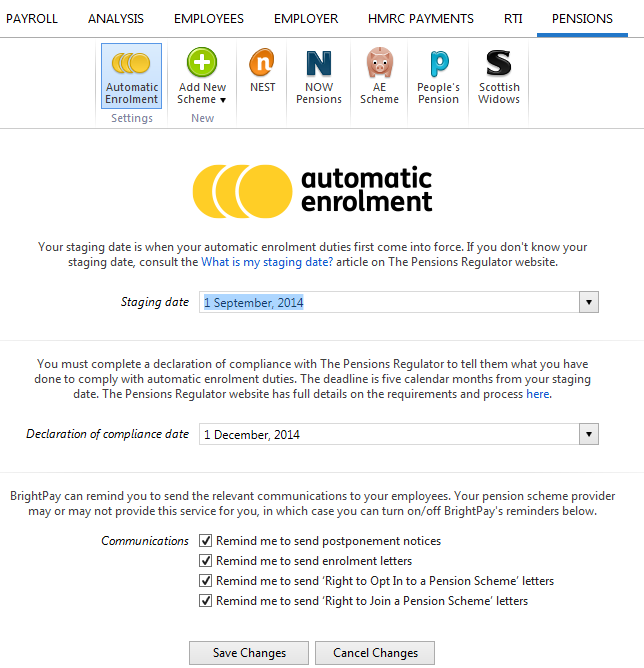
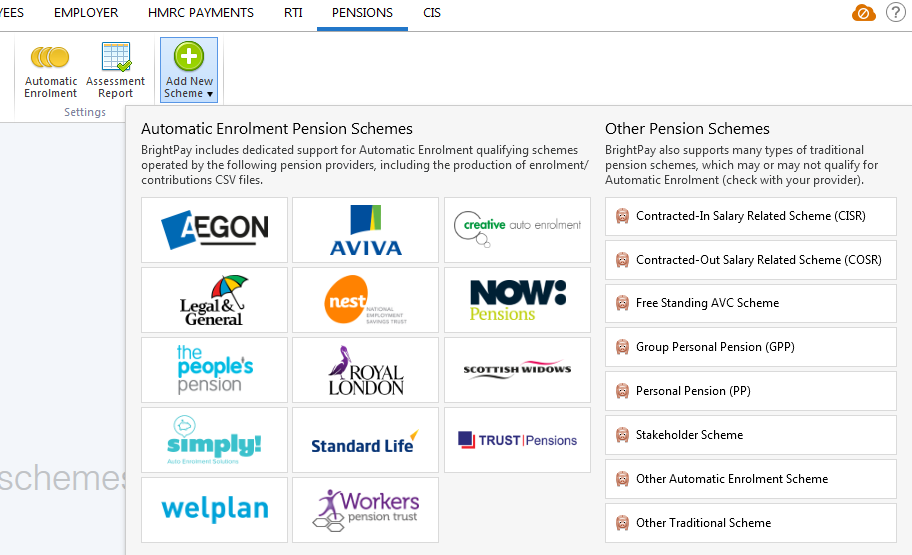
2) Next, enter the details of your automatic enrolment pension scheme(s) within the Pensions utility.
- click Add New Scheme and select the pension scheme option you require from the listing
- enter in the details of the pension scheme accordingly, and click Save
3) Return to Payroll and set up your Payment Schedule, if not done so already. Enter the pay details for each employee in your first pay period if known.
4) Within Employees, select the first employee in the listing and click their Automatic Enrolment tab on the menu toolbar.
- If the assessment of the employee (eligible jobholder, non-eligible jobholder or entitled worker) is correct, simply select:
- Enrol - if the employee is an eligible jobholder
- Opt-in - if the employee is a non-eligible jobholder
- Join - if the employee is an entitled worker
- If the assessment of the employee (eligible jobholder, non-eligible jobholder or entitled worker) does not reflect the employee's correct work category (possibly due to lack of pay information or a differing pay amount has been entered placing them in a different work category), simply select:
- Enrol/ Join/ Opt in
- Select the correct assessment you require from the drop down menu:
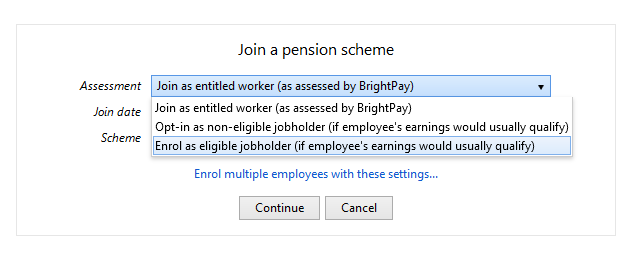
- enter the original Enrolment Date/ Join Date/ Opt-in Date
- select the AE scheme applicable to the employee
- Select the applicable Tax Relief from the drop down listing
- Press Continue
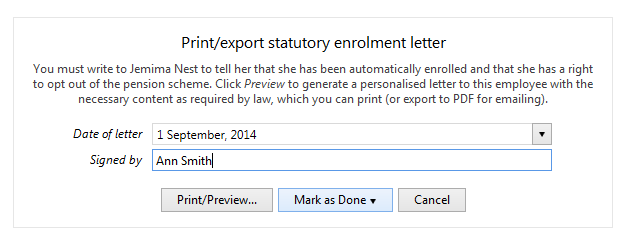
- As you will already have communicated with the employee, there is no requirement to provide the employee with the enrolment letter which BrightPay will now generate for you. To indicate that you have already communicated with the employee, click Letter followed by Mark as Done:
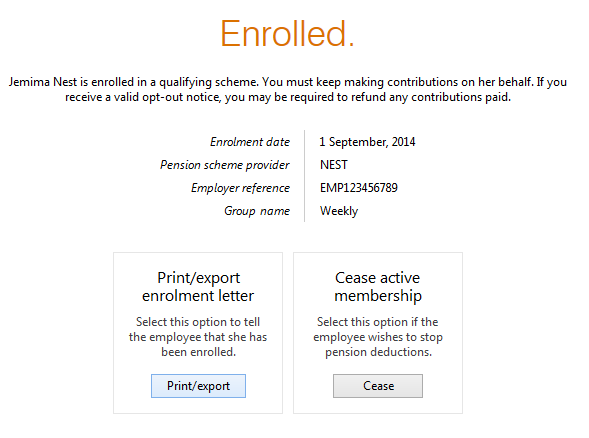
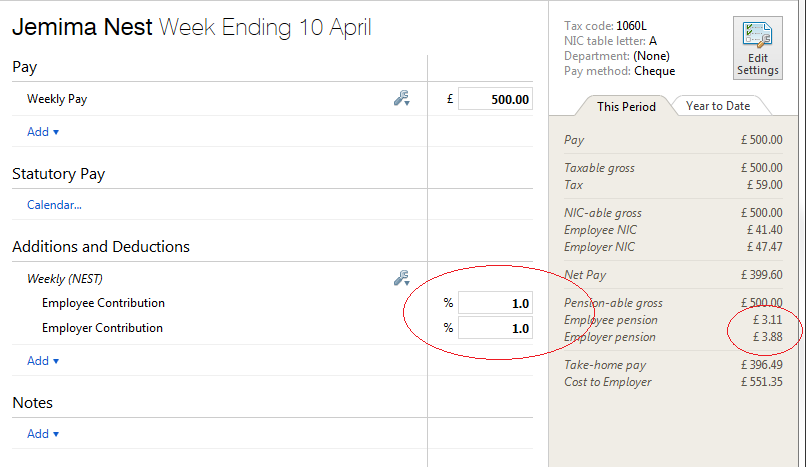
- On returning to the Payroll utility, you will now see the appropriate pension deductions being applied to the employee's payslip in line with the employee's required AE settings:
- Repeat step 4 for each employee in order to update their automatic enrolment information.
Batch Processing of Employees
BrightPay facilitates the batch processing of employees who have the same automatic enrolment settings, thus eliminating the requirement to automatically enrol, postpone, etc. employees on an individual level.
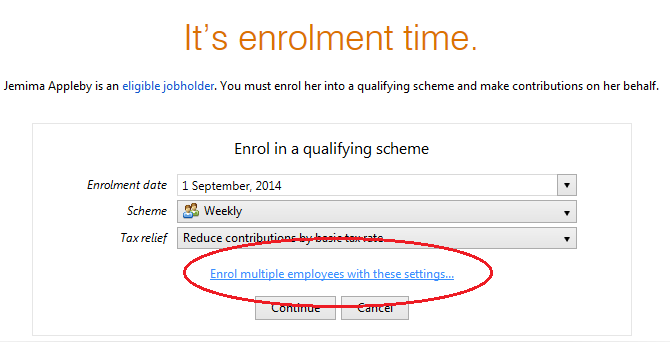
At the time of enrolling one employee, you will have the option to enrol multiple employees with the same settings:
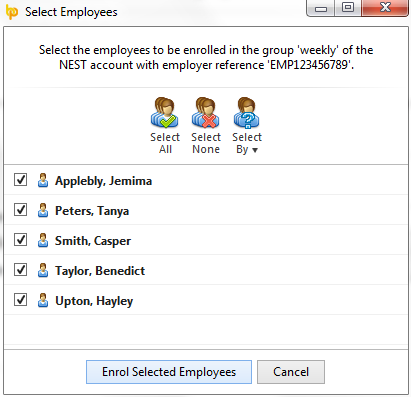
- Simply select the employees who you wish to enrol and click ‘Ok’ to complete their enrolment all at the same time:
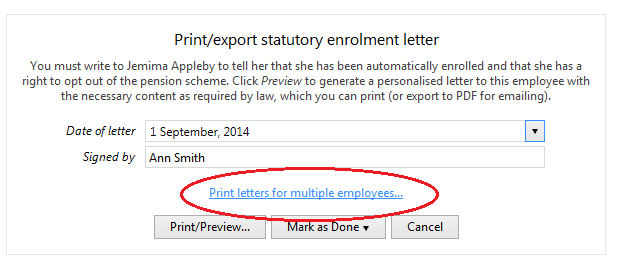
- In the same manner, you will also be given the option to batch process the enrolment letters which BrightPay will automatically generate for each employee enrolled. As you will already have communicated with your employees, there is no requirement to provide the employee with the enrolment letter again. To indicate that you have already communicated with the employees, click Letter on an enrolled employee's Automatic Enrolment screen followed by Print letters for multiple employees:
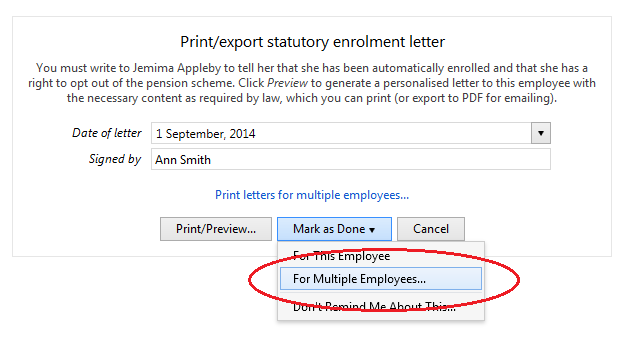
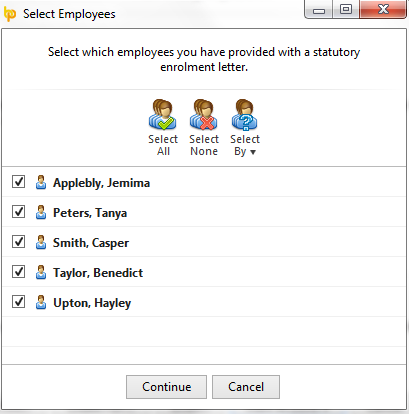
- Under Mark as Done, select For Multiple Employees and select the employees for whom you have already communicated with:
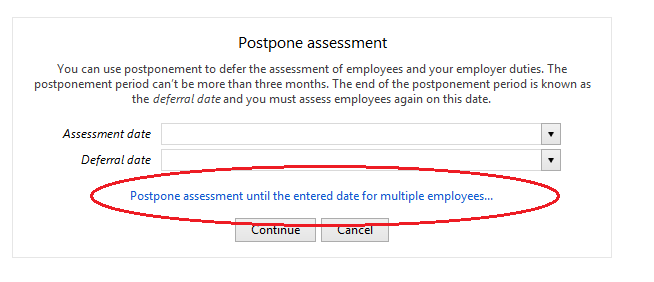
- Likewise, employees can be batch Postponed, if applicable:
Need help? Support is available at 0345 9390019 or brightpayuksupport@brightsg.com.


