Enabling Employee Access to Self Service
BrightPay Connect provides a web-based portal where employees can view/ download their payslips and other payroll documents, view their calendar, request annual leave and view/ edit their personal details.
There are two ways for an employer/ bureau to set up employee access to self service:
a) When linking an Employer to BrightPay Connect for the first time
1) Within your BrightPay software, open the company you wish to connect and click the Cloud icon in the top right hand corner of the screen.
2) Enter your BrightPay Connect login details and click ‘Sign In’.
3) Next, click 'Link Employer to BrightPay Connect' to bring you through to the set-up wizard.
4) Read the information on the following two screens and click ‘Next’ when ready.
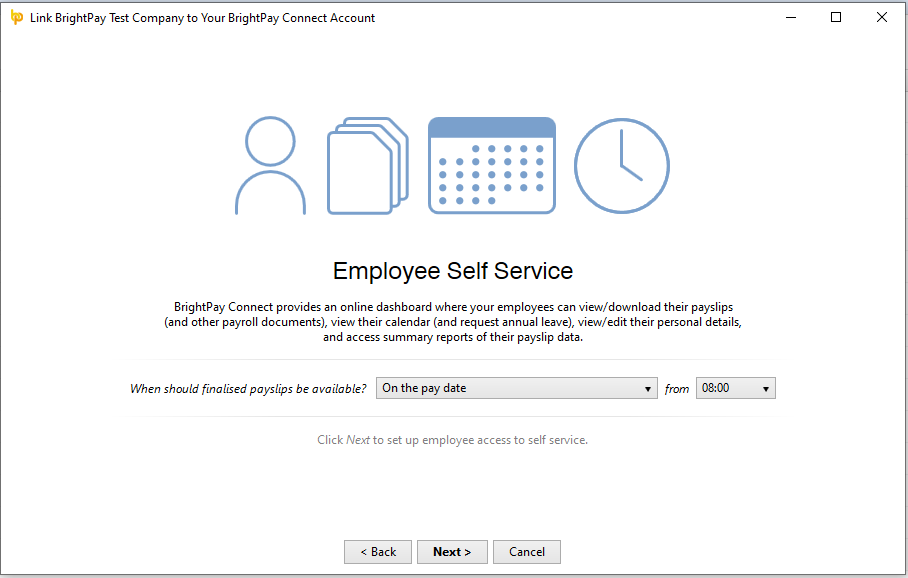
5) On the Employee Self Service screen, if your employees will be availing of the employee self-service facility, select when you would like finalised payslips to be made available to them and click ‘Next’ again.
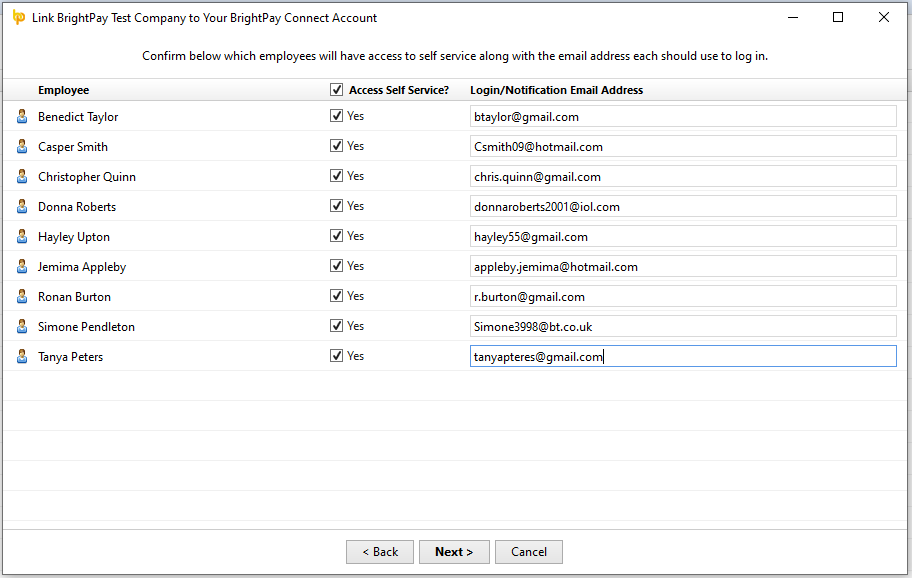
6) On the following screen, confirm the employees who will have access to Self Service, along with the email address they will each use to log in (each email address entered must be unique).
7) You are now ready to link your employer file to BrightPay Connect. Click ‘Finish’ to complete the process, followed by ‘Close’.
b) Using 'Employee Self-Service Options' within your BrightPay software
1) Within your BrightPay software, open the company you require and click the Cloud icon in the top right hand corner of the screen.
2) Enter your BrightPay Connect login details and click ‘Sign In’.
3) Next, select 'Employee Self-Service Options' under the Cloud icon.
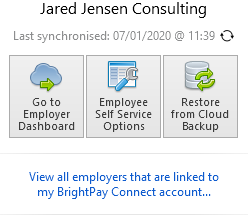
4) Under 'Employee Access', confirm the employees who will have access to Self Service, along with their email address they will each use to log in (each email address entered must be unique). Click 'Save' on completion..
5) Under 'Payslip Availability', select when you would like finalised payslips to be made available to the employees and click ‘Save’ on completion.
You are now ready to send invitation emails to your employees to notify them that they now have access to the Self Service portal, where they can access their payslips and other payroll documents, view their calendar and request annual leave, and view/update some of their personal details.
Sending Self Service Invitation Emails
1) Log in to your BrightPay Connect account and access the employer in question within 'Employers'.
2) Click 'Employees' - here you will find the employees that are within the BrightPay employer file that has been linked to BrightPay Connect.
3) At the top right of the screen, click 'Send Invitation Emails'.
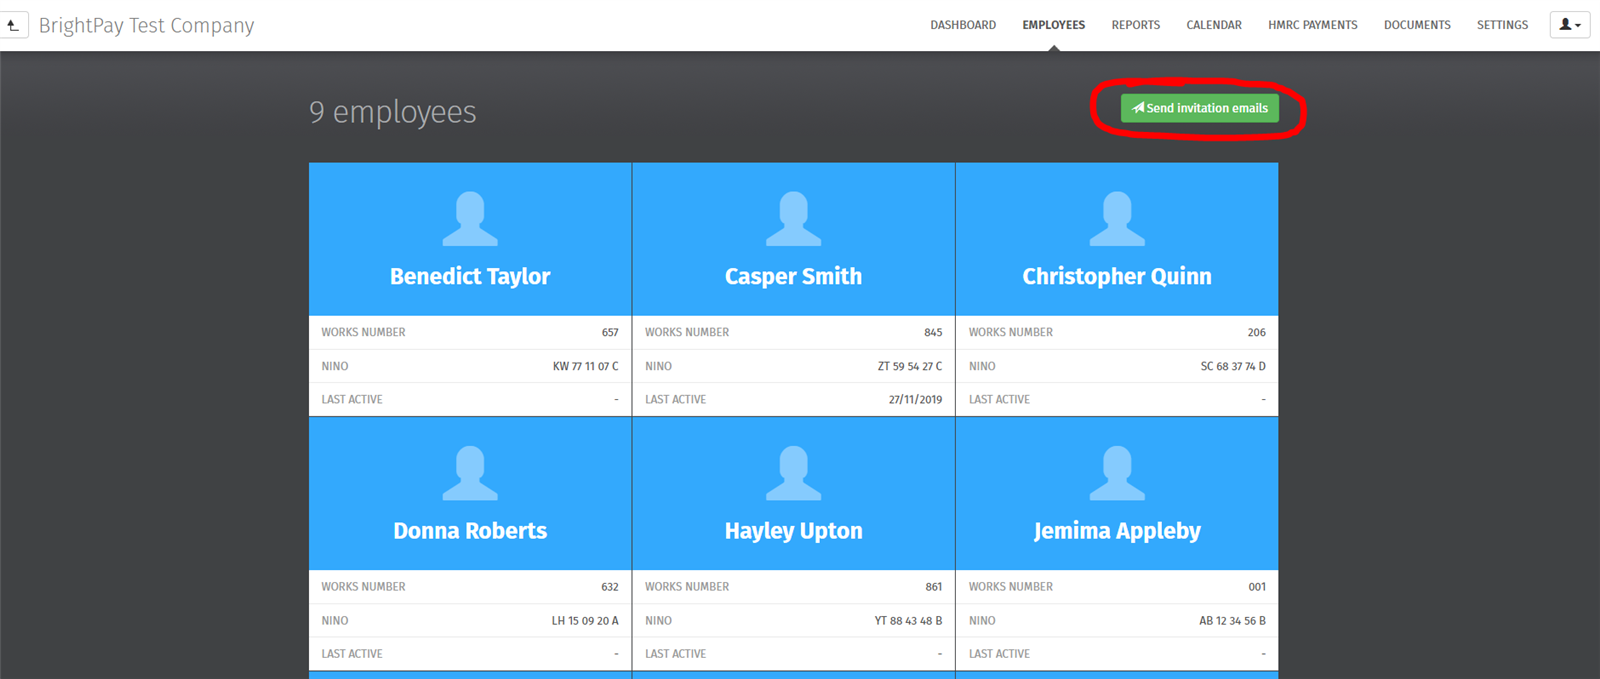
4) Select each employee that you would like to send a personalised email to with an overview of Self Service and instructions on how to log in.
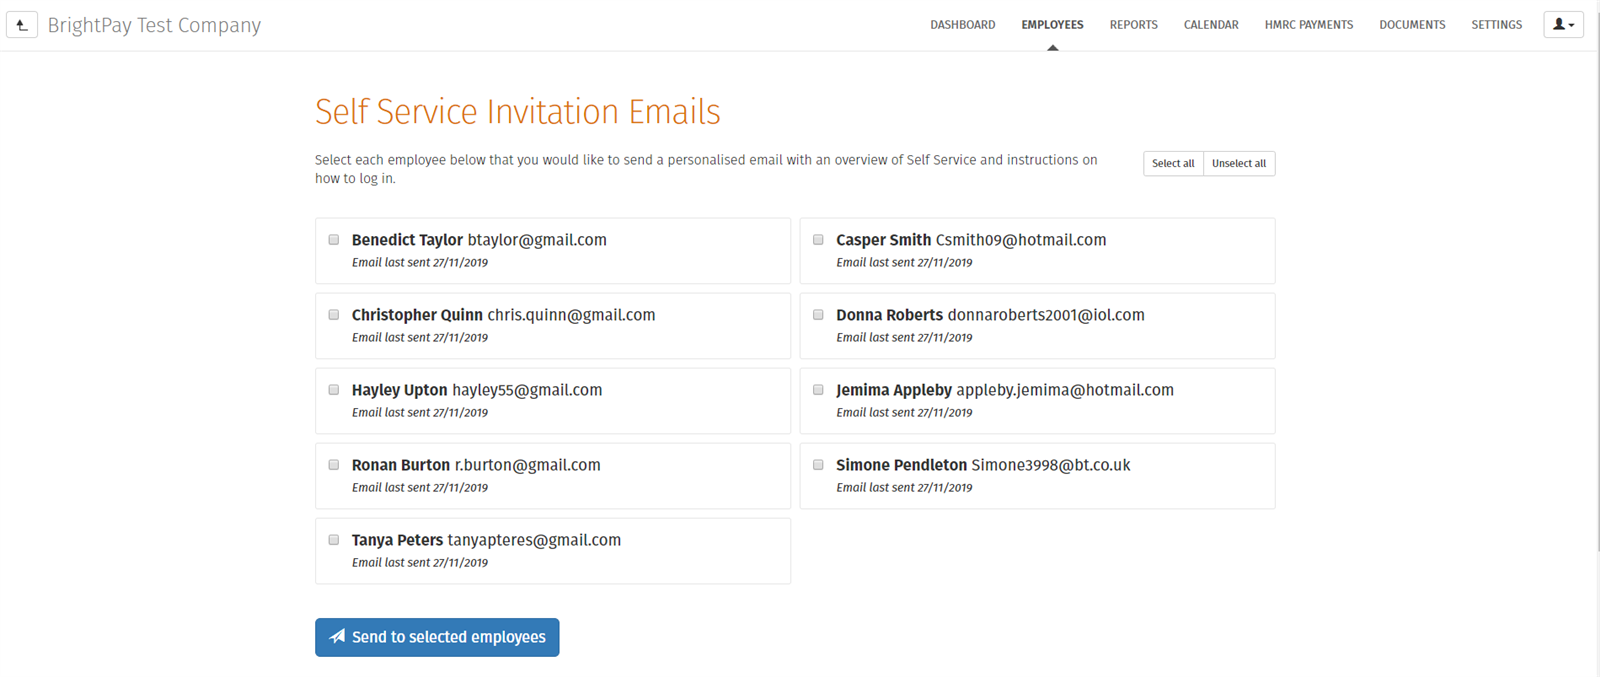
Please note: employees for whom self service has not been enabled will not be available for selection.
5) Click 'Send to Selected Employees' when ready and click 'OK'.
All employees selected will be sent a welcome email containing instructions on how they can log in to their own self service portal.
Editing/ Disabling Self Service for an Employee
You can enable or disable access to Self Service and set/ change the email address and password for each employee at any time using BrightPay on your computer.
1) Within your BrightPay software, open the company you require and click the Cloud icon in the top right hand corner of the screen.
2) Choose 'Employee Self Service Options'.
3) Make any required changes and click 'Save'.
4) Synchronise your data back up to BrightPay Connect for the changes to take effect.
Need help? Support is available at 0345 9390019 or brightpayuksupport@brightsg.com.


